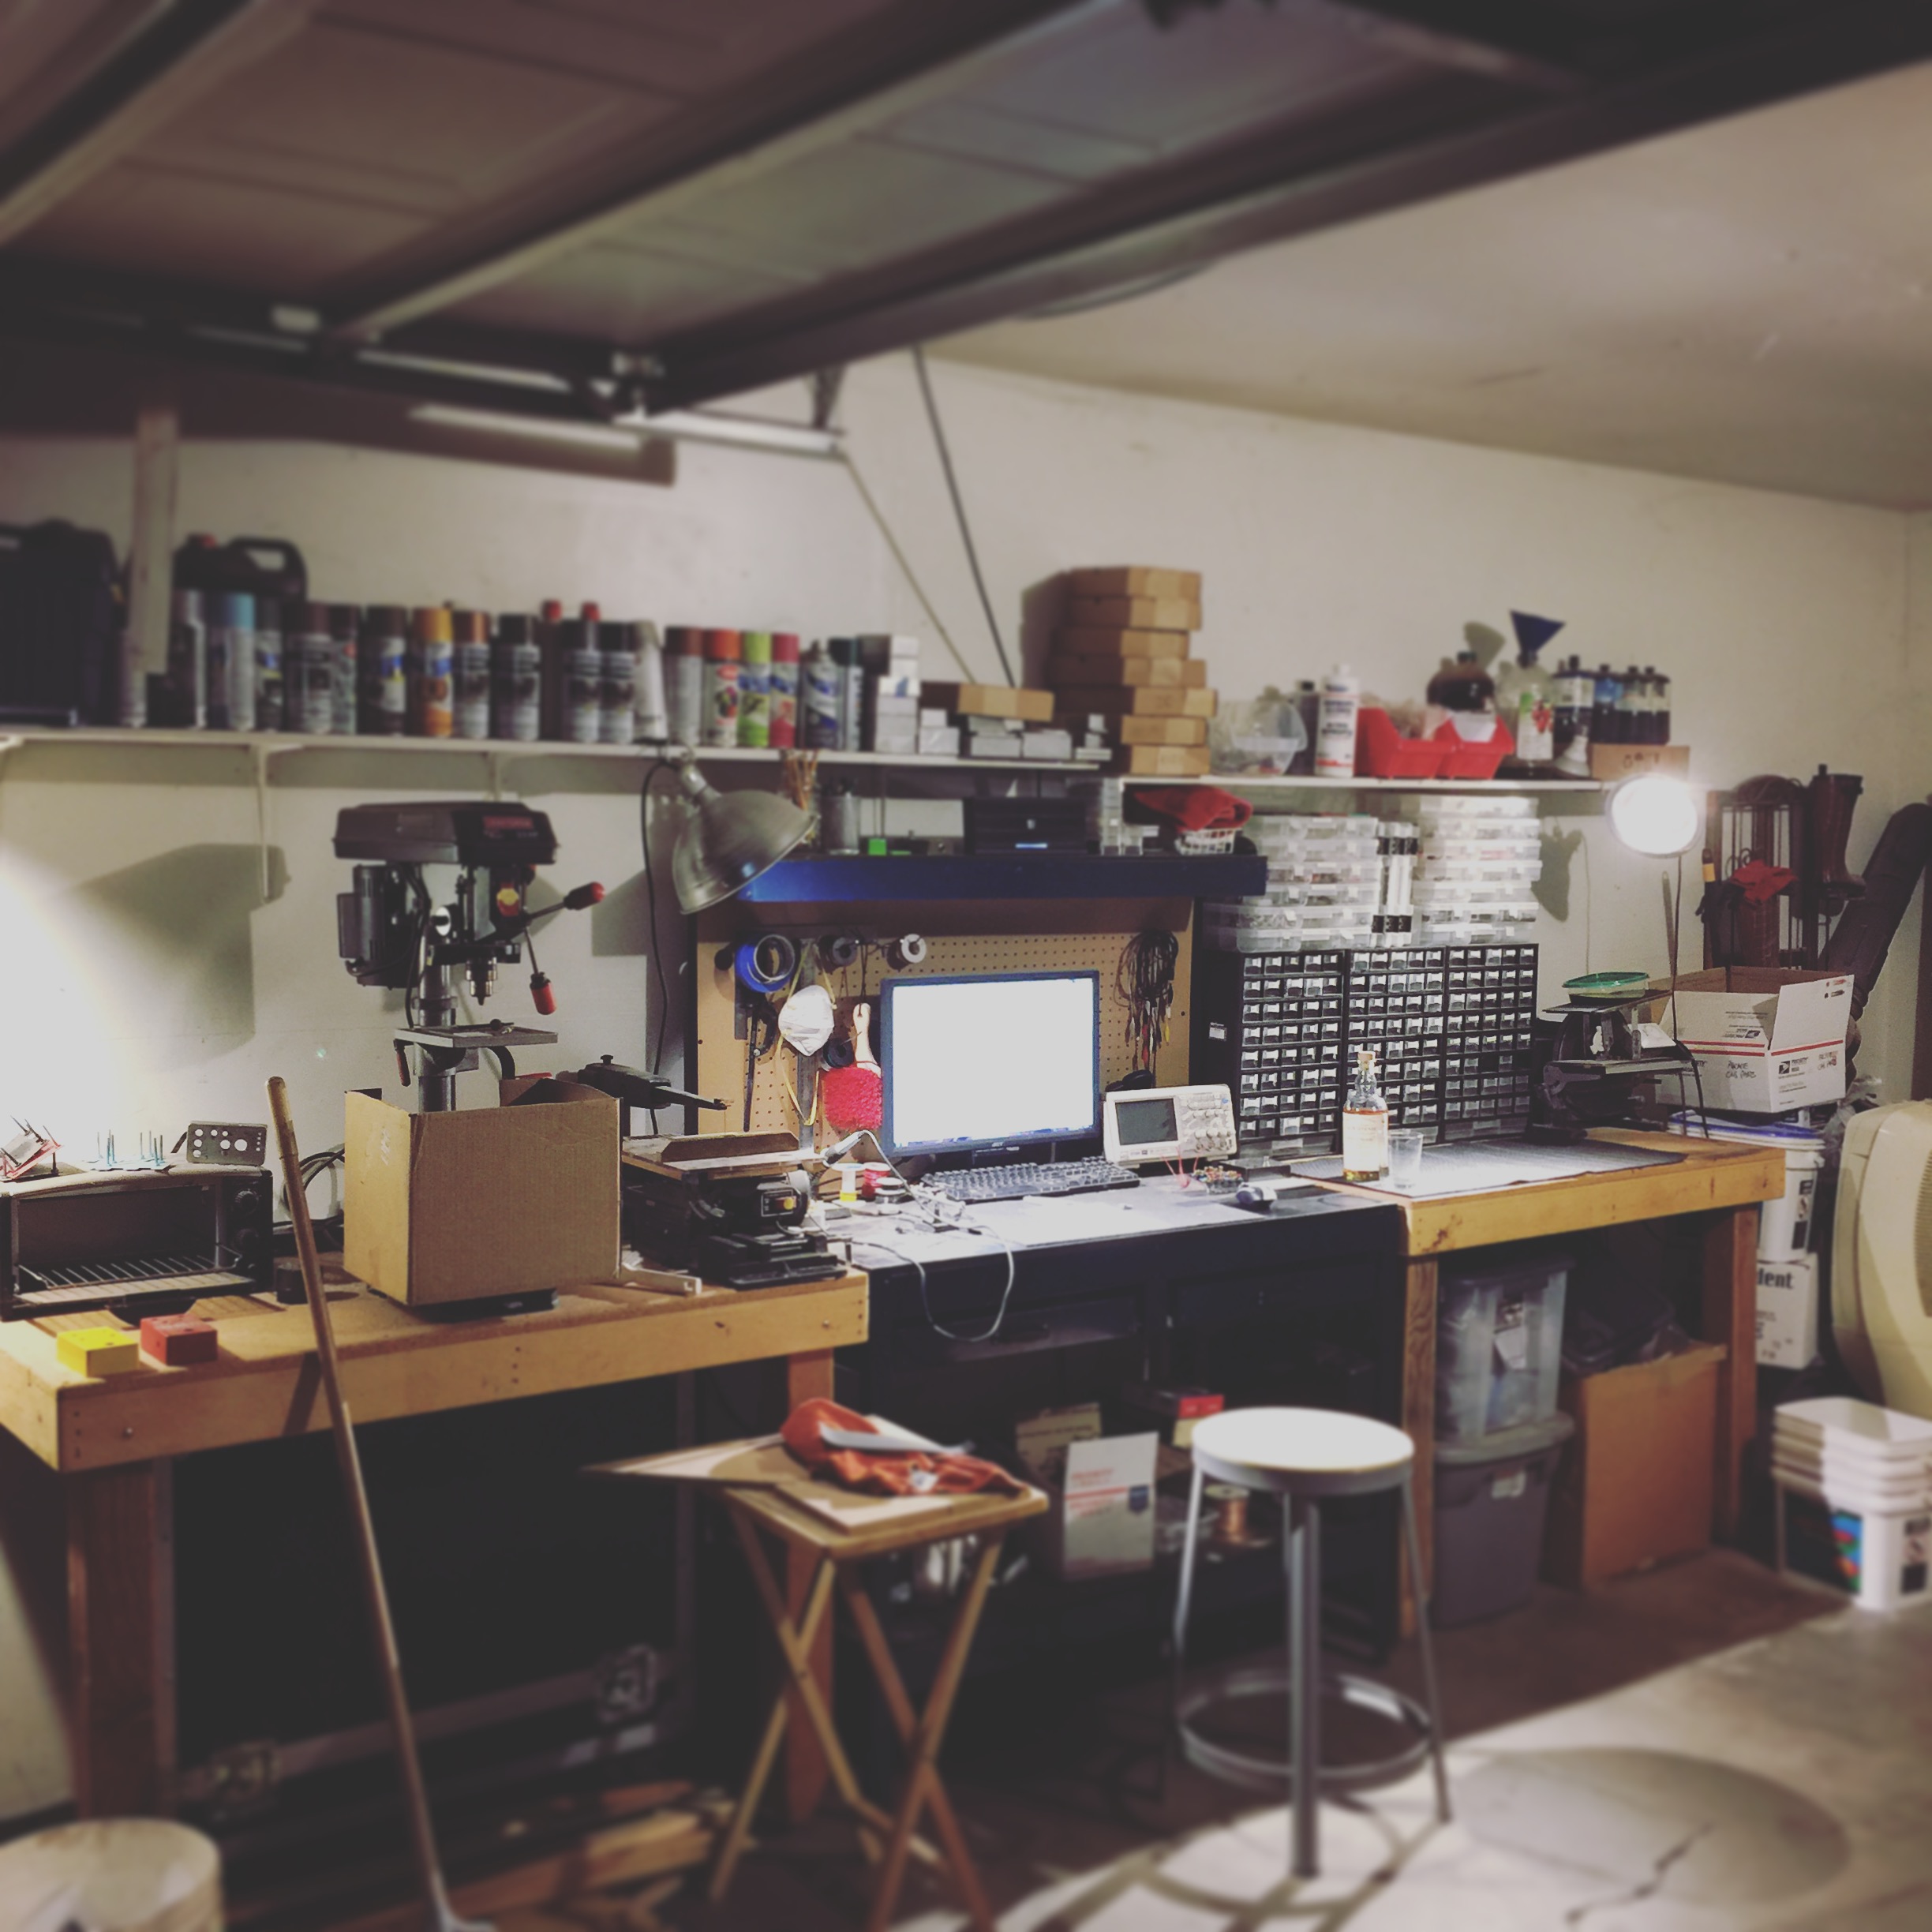
Whats on my bench and why?
Flush Cutters: From cutting leads off the bottom of PCBs to cutting hookup wire these are one of my most used tools on the bench. I had a cheap Harbor Freight pair I had that dulled and broke with in a month. I now own a pair of Xcelite that I picked up from Frys and I love them.
Long Nosed Pliers: I mainly use these to hold parts or to help feef wire in a enclosure. The Xcelite pair I got are still in great shape for being a year old and have a good amount of use.
Precision Screw Driver Set: I own a Boxer Precision Bit Set that I picked up at Frys but they are sold on Amazon and Newegg also. There seems to allways be a need for precision screwdrivers. From tighting the screw on a knob to opening an enclosure.
Wire Strippers: Nothing special about mine, they just work. Just find a pair that works for you and get to stripping.. wait..what?
Automatic Center Punch: The quickest solution for punching your enclosures before you take it over to the drill press. Best $1.99 I ever spent.
Soldering Station (Variable Temperature): This is where I spent some time doing some research and wanted to get the best bang for my buck. Now, I did buy this about 5 years ago and did not have pedal building on the mind. I used it mainly for modding game consoles and small DIY gaming projects. I ended up getting a Weller WESD51 and have loved every minute I use it.
Brass Sponge: Got to keep that soldering iron’s tip clean. This can be overlooked and its a cheap buy. Get one!
Desoldering Pump: You will need to remove components off a PCB at some point and this is the best way to do it.
Digital Multimeter: When I was looking for a new DMM I wanted just something basic that will meet my needs and unfortunately I was unable to afford a Fluke at this point so I wanted something that would be as/as close as accurate. I ended up picking up a Sinometer MS8229 for $40 and I love it. It has WAY more bells and whistles than I need but it will do the job just fine.
Digital Oscilloscope: Picked up a Atten ADS1062CAL Digital Oscilloscope for a very good price and I am still learning to use it properly. It seems like it will be a tool that will payoff with in time.
6″ Digital Calipers: I am the worst at measuring things, let alone very small things. These were a necessity for me. Maybe you are the same.
Step Drill Bit Set: All hail the best thing since sliced bread or some other kind of awesome invention we relay on. I picked up a basic set of three from Sears and a cheat sheet that says for an example: 1/4 inch jack in 3 steps down on the drill bit. With this cheat sheet I can make all my needed holes very quickly. Nothing to fancy.
Drill Bit Set: Basic set just for odds and ends. I picked up some at Sears that work with the Speed-Lok system just for convenience.
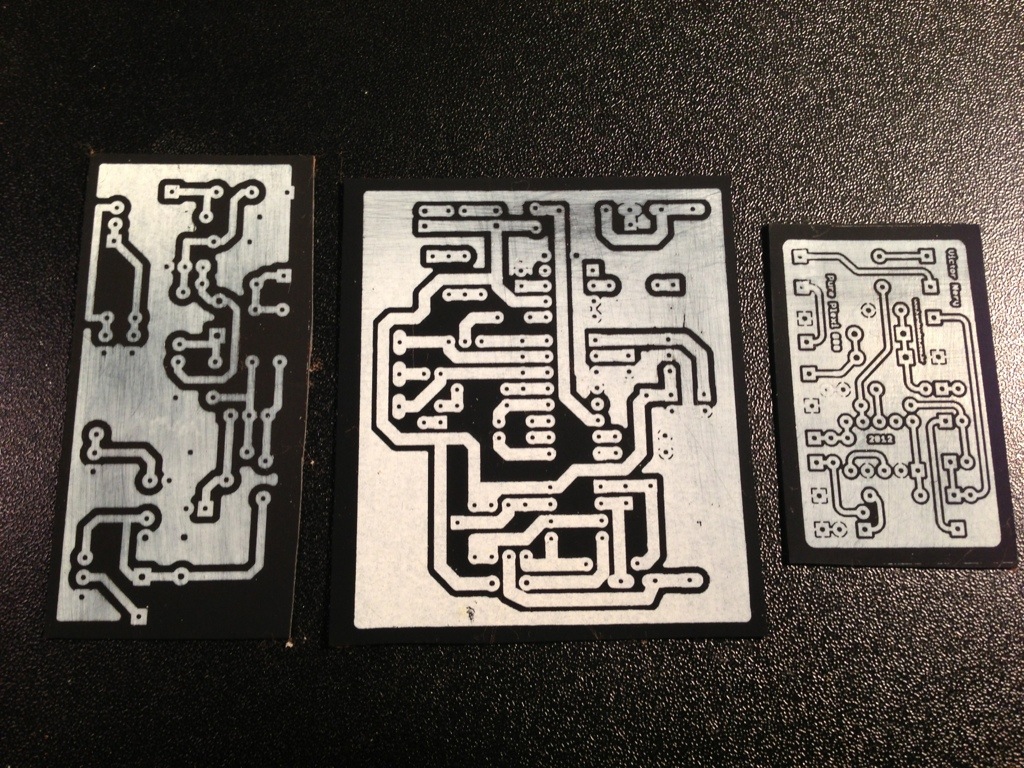
CNC Drill Bits (For PCBs): Want to etch your own PCBs? If you answered “yes” then you will need some of these. I picked up a set of the most used from eBay for $12.
Small Drill Press: This was one of the tools that I put off for so long and I wish I would not have. I was using a hand drill to drill all holes on an enclosure and it was a crap shoot if they came out properly. I finally found a small bench-top drill press that worked for me and was very reasonably priced. I got the Craftsman 10” Drill Press and never looked back.
Craftsman Speed-Lok: Its great to be able to swap a drill bit or a step drill bit instantly without the need for a drill chuck. Makes life a little better at the bench. I am sure there are other brands of this product but this is what I went with.
Glue Gun: I use this mainly for LED bezels and sometimes for wire management.
Toaster Oven: I like to make toast and heat up pizza at the bench… I kid, i kid. This is another thing I put off getting and now I see it as an essential part of my bench. I can paint an enclosure and stick it in the toaster over for 15 minutes at 150 degrees and let it cool for another 15 minutes and you are ready to assemble your pedal. Its great for quick builds and for drying in between paint layers. I ended up picking up one at a thrift store for $10 and it works great. I do recommend that if you do buy a used one, use a oven thermometer to make sure it gets the desired temp and not trust the gauges.
iPad/iPhone Charger: My iPad/iPhone seems to live on my bench when I am working on a project. I hate when the batteries die when working on a project.
iPad: I use this mainly for Google Drive to access all my build documents and for streaming music at the workbench. As of late, I found that Netflix and Hulu is great also at the bench to help calm things down.
Portable Bluetooth Speakers: Not a must but it sure makes the music or TV/Movies sound better from the iPad.